Integrate BroadLink RM4 Mini with Home Assistant
Today, we are going to set up the BroadLink RM4 Mini universal remote. you'll need to set up the Broadlink integration in Home Assistant, learn the necessary IR commands for your climate device, and then configure a custom climate entity that utilizes these commands.
Table of Contents
- What is a BroadLink RM4 Mini ?
- Adding a BroadLink RM4 Mini device to BroadLink app via Wi-Fi
- Adding a BroadLink RM4 Mini device to Home Assistant via BroadLink Integration
- Learn a remote controls in Home Assistant via Developer Tools
- Where to find the list of registered commands
- Instructions on how to setup the Climate platform
- Instructions on how to setup the Media player platform
- Instructions on how to setup the Fan platform
- Template switch
- Set up scripts to trigger commands
What is a BroadLink RM4 Mini ?
You can configure BroadLink RM4 Mini to control devices that use an IR remote control.
Then, using the BroadLink app on a mobile device, you can send commands to those devices. However, we are going to integrate the BroadLink RM4 Mini with Home Assistant, so you will only need to use the app to configure the RM4 Pro remote to connect to the Home Network.
After that, you can continue the configuration in Home Assistant.
Software
https://www.home-assistant.io/integrations/broadlink/
https://www.home-assistant.io/integrations/climate/
Hardware
BroadLink RM4 Mini - Will send the commands to the AC
Adding a BroadLink RM4 Mini device to BroadLink app via Wi-Fi
Set up the BroadLink RM4 Mini using Broadlink's mobile app
Note
unlock device
Now to integrate the BroadLink RM4 Mini to Home Assistant, you need to unlock the remote. So, tap on Use device now to exit the setup. Tap on the menu icon on the top right, uncheck the option, Lock device, and tap OK to confirm on the pop-up that comes up.
static IP address
You have the BroadLink remote set up with a Static IP address In your network.
The BroadLink remote is now connected to the home network, and it is also unlocked. At this point, you no longer need the BroadLink app. However, before you integrate the BroadLink remote with Home Assistant, you need to set it up in your router with a static IP address. If you need to locate the remote’s MAC address, you can go back into the BroadLink app, select the universal remote, tap on the menu icon on the top right, and you can find the MAC address under Device info.
Adding a BroadLink RM4 Mini device to Home Assistant via BroadLink Integration
Set Up Broadlink Integration in Home Assistant.
you can configure Broadlink manually by taking the following steps:
Open Home Assistant.
In the sidebar menu click on settings.
From the configuration menu select devices & Services.
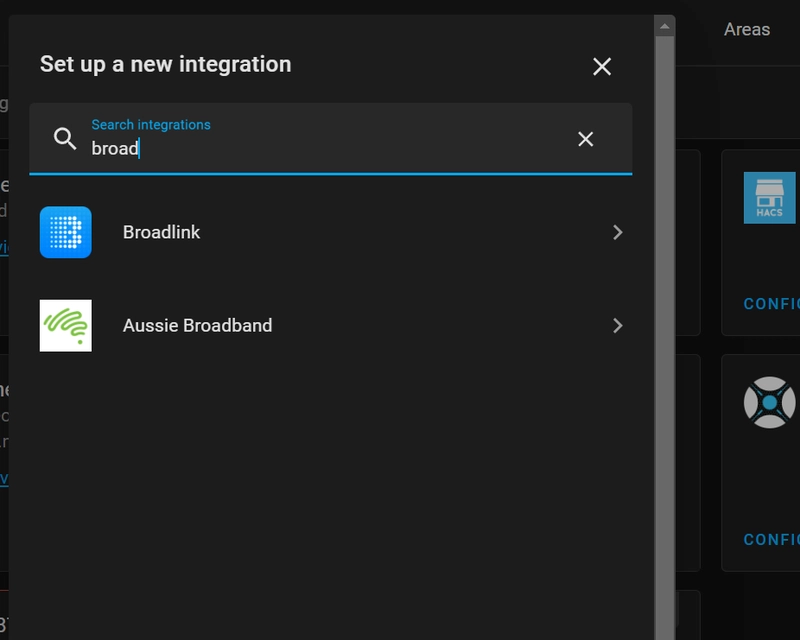
In the bottom right, click on the add Integration button.
From the list, search and select “Broadlink.”
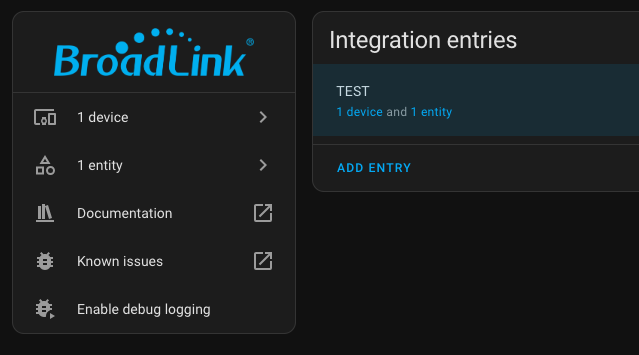
Simply follow the instruction on screen to complete the set up.Device info
RM4 mini by Broadlink
Firmware: 62092
MAC: E8:E8:E8:E8:E8:B3
you will get:
entity_id: remote.zhi_neng_yao_kongLearn a remote controls in Home Assistant via Developer Tools
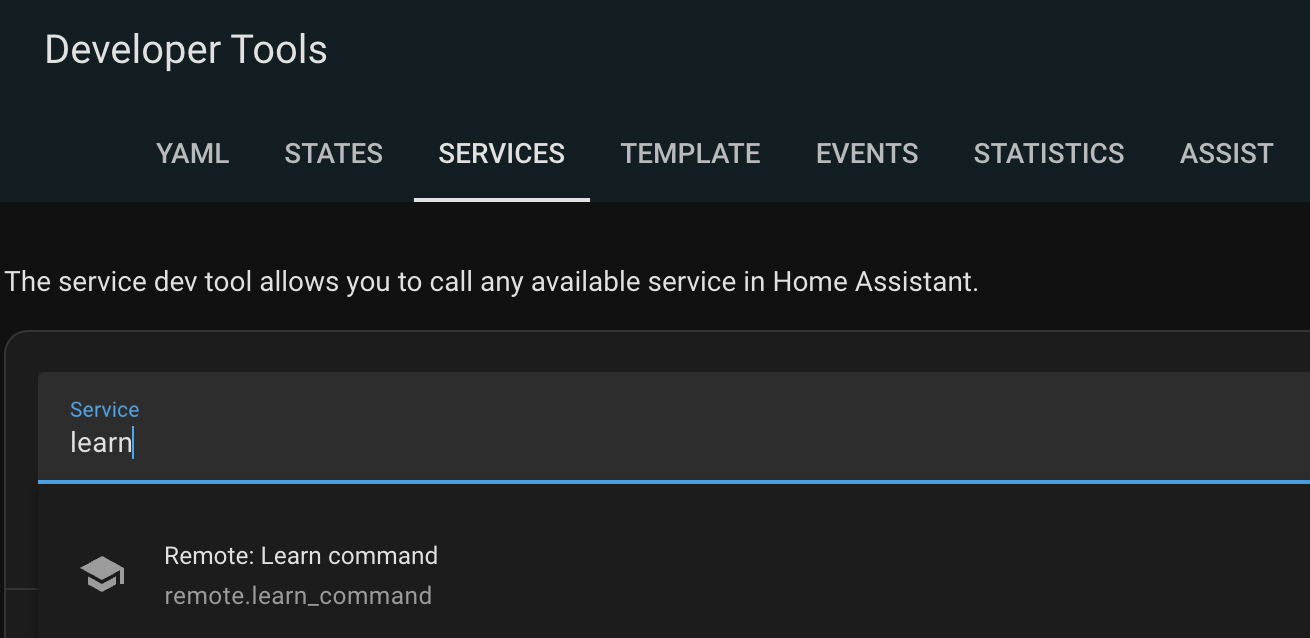
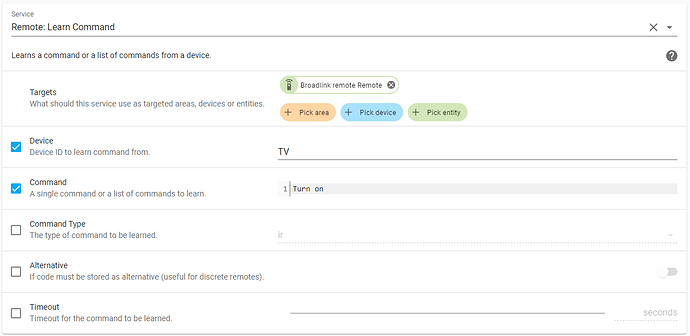
remote.learn_command
Use remote.learn_command to capture codes. Go to Developer Tools, Services. Then Select: Remote: Learn command

Alternative option checked only useful for discrete codes
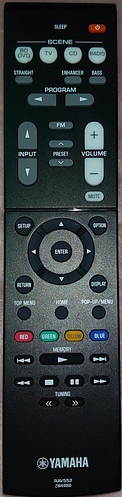
This is the remote I am copying
Adding IR remotes
When you register buttons, the command type is set up by default to IR (Infrared). However, to register an RF (Radio frequency) button, you need to change the Command type from IR to RF. When you call the service, the notification panel shows the instruction to press and hold the button you want to register. The light on the Broadlink remote will be lit in red while it is checking the frequency. Then after a few seconds, the notification goes away, and another notification comes up asking to press the same button again to register the new RF command.
Go to Developer Tools | Services and enter the service name remote.learn_command (you’ll get a drop-down as soon as you start typing “remote”)
UI MODE
YAML MODE
service: remote.learn_command
data:
  device: Gree
  command: Cool
  command_type: ir
target:
  entity_id: remote.zhi_neng_yao_kong
or
You can learn IR codes by directly calling the service in the developer tools section.This is what it looks like in my case:
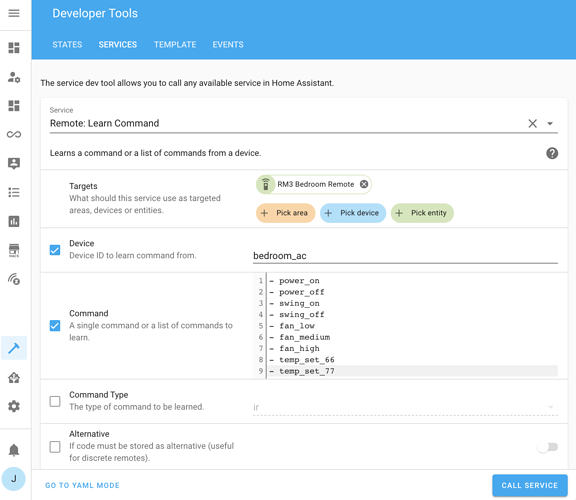
entity_id: your broadlink
device: your remote control
command:
  - power on
  - power off
Re-register commands
If you register the wrong button by mistake, you can run the process again to register the right button. When you call the service to register a button already registered, Home Assistant will overwrite the existing one with the code for the new button that you press.
Delete commands
If you want to delete one of the registered buttons, you can use the service remote.delete_command, select the BroadLink remote under Target. Select Device and enter the name of the device’s remote control. Then, under Command, enter the button’s name that you would like to delete and then click on Call service.
Sending commands
Check everything worked correctly
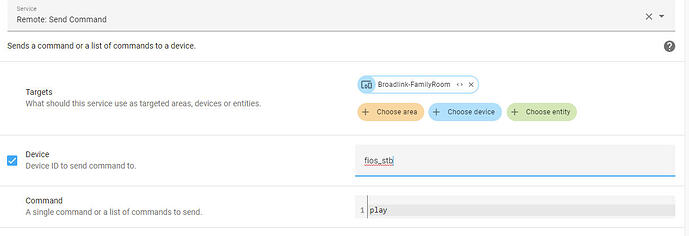
To test if a command is working. You can call the service remote.send_command. Under Target, select the BroadLink remote. Under Device, select the device that you would like to send the command to. Then, under Command, enter the name of the button and then click on Call service.
To test the code, you only need to change the “Service”.To make sure it works after you’ve set it up, just run:
remote.send_command
YAML MODE
service: remote.send_command
data:
  command: Cool
  device: Gree
target:
  entity_id: remote.zhi_neng_yao_kong
Note
1.When you want to send a command in an automation or script, use remote.send_command not remote.turn_on (that turns the Broadlink on…) and use the device ID and command that you created.
2.If it doesn’t work, then learn the code again.
3. the Device and Command are case sensitive. They must be identical.
4.selected Target from “Device” and not from "Entity.
Where to find the list of registered commands
If you need to see the list of commands you have registered for your remotes, go to the Home Assistant configuration files and locate the Storage folder. This folder is hidden, so you would need to enable the option to show hidden items in the File Explorer. Once you open that folder, locate the broadlink_remote_codes file, and you’ll be able to see the names and codes for the buttons of your remotes.
Open .storage/broadlink_remote_{BroadlinkMAC}_codes in a text editor.
It will look like this:
{
  "version": 1,
  "minor_version": 1,
  "key": "broadlink_remote_eeeeeeeeeb3_codes",
  "data": {
    "gree ": {
      "Cool": "JgBSAAABHY8UNRMRFRITNhUQFBITERMSEhQTERMTEjcUEhITExITEhITFRETExITFBETNhMSExITExETFBITEhI3EhMTNhMSExIUNRMTEwAJLRgADQU="
    },
    "Gree": {
      "Cool": "JgBeABAUBwAEnwQAAoIICQoACGAAAR2OFTQUERUREzcUERMTExESExITFBESFRE3FBITERQSEhMSExURExMTEhQSEjUVERMTEhITExIUExETNxISFDUUERQSEzYSFBMADQU=",
      "Turn on": "JgA8AAUNCAADuggAAngIAAURBxUIAAVyCREHAAHnCQACgQcAB/sKDwslCAAB2xApBwAE2A4AB5MMEQUaBgANBQ=="
    }
  }
}
One thing to have in mind is that you do not want to edit this file manually. If you need to change, add or remove a command, you need to do it directly from the web interface using the process I showed you before.
Instructions on how to setup the Climate platform
Instructions on how to setup the Media player platform
Instructions on how to setup the Fan platform
Template switch
#Broadlink.yaml
#Examples for your Configuration.yaml
  - platform: broadlink
#    host: 10.0.0.83
    mac: 'C8:F7:42:40:AF:85'
    switches:

      - name: "TIT_TV"
        command_on: "JgBWAJKSExETNhI3EzYTERITExESExISEjcSNxI3EhISEhMSEhITEhISEjcTNhISEhMSEhISEzYTNhITEhISNxI3EjcSNhIABfWSkhM2EgAMN5GTEjcSAA0FAAA="
        command_off: "JgBWAJKSExETNhI3EzYTERITExESExISEjcSNxI3EhISEhMSEhITEhISEjcTNhISEhMSEhISEzYTNhITEhISNxI3EjcSNhIABfWSkhM2EgAMN5GTEjcSAA0FAAA="

      - name: "room_FAN"
        command_on: "JgBIAAABLZMTExITExISExMSFBISExITEzYTNxI3EzcTNhM3EzYTNhMTEhMSExM3EjcSExMSFBISNxM2FDYTEhMSFDYSNxM3EgANBQ=="
        command_off: "JgBIAAABLZMTExITExISExMSFBISExITEzYTNxI3EzcTNhM3EzYTNhMTEhMSExM3EjcSExMSFBISNxM2FDYTEhMSFDYSNxM3EgANBQ=="

#==================
Set up scripts to trigger commands
To execute the commands from the web interface, you now need to create scripts for those commands. This would create entities that you can add to your Home Assistant interface and easily trigger those commands.
So, in your Home Assistant, go to Configuration, Scripts, and click on Add script. Set up a name for the script and also an icon. Then, under Sequence, Set the Action Type to Call service. Under Service, search for remote.send_command and select it. Now, under Target, click on Device and select the BroadLink remote. After that, select the Device option and enter the device’s name that you would like to send the command to. Then, under Command, enter the name of the button that you would like to execute.
There are other useful variables here that you can use. For example, the Repeats option comes in handy when setting a script to raise or lower the volume a specific number of times with just one click. The Delay option can also help when you are executing several commands in one script. And the Hold option is good for remotes with a button that triggers a second command when held for a few seconds. Save the script and run it to verify that it’s working properly. You can then add the script as a button on your dashboard and easily trigger the command to control your device.
useful links
https://siytek.com/home-assistant-ir-blaster-setup-guide/
https://www.bazmac.me/blog/using-broadlink-rm4-pro-with-home-assistant
http://localhost:4999/boards/topic/14498/broadlink-rm-irrf#43486
Comments
Comments are closed